- • Requirements for the controlled devices
- • Dashboards, Zones, Categories
- • Simple thermostat with hysteresis
- • Simple Heating management using Weekly schedule and Presence switch
- • Power limiting
- • Notification on high temperature (DEPRECATED)
- • Configuring hysteresis control via Equation Smart Rule
- • PID Temperature regulation
- • PID Cascade
- • Regulation of Boiler Cascade
- • Equithermic regulation
- • Heating control in high electricity tariff via load management tariff indicator input
- • Heating and Cooling modes
- • Editing multiple devices at once
- • Setting the response speed of push buttons
- • Integrate multiple control units Core
- • Safe values
- • How to combine two daily schedules in one day
- • Linking devices together
- • Device log
- • Using statistic values in Smart Rules
- • Hot water circulation pump control
- • Exporting data from TapHome into Google Spreadsheet using Integromat
- • Exporting device descriptions
- • 2025
- • 2024
- • 2023
- • 2022.2
- • 2022.1
- • 2021.3
- • 2021.2
- • 2021.1
- • 2020.1
- • 2019.1
- • 2018.1
- • 2017.1 - Blinds automation - angle control update
- • 2017.1 - Blinds automation - Depth of sun rays
- • 2017.1 - Charts updated
- • 2017.1 - Core update from the app
- • 2017.1 - Double click and triple click
- • 2017.1 - Expose devices
- • 2017.1 - Multi-value switch
- • 2017.1 - Permissions
- • 2017.1 - Replace module action
- • 2017.1 - Set to Automatic mode - "Push buttons event" Smart Rule
- • 2017.1 – Daily schedule Smart Rule
Akuvox
Akuvox R20A starts with DHCP enabled. There is partially functional ONVIF - so it is possible to find the door bell on the network by TapHome app. When you have the IP address of door bell use it in web browser to login to device with default account admin and password admin.
Select Intercom - Basic settings and set following parameters:
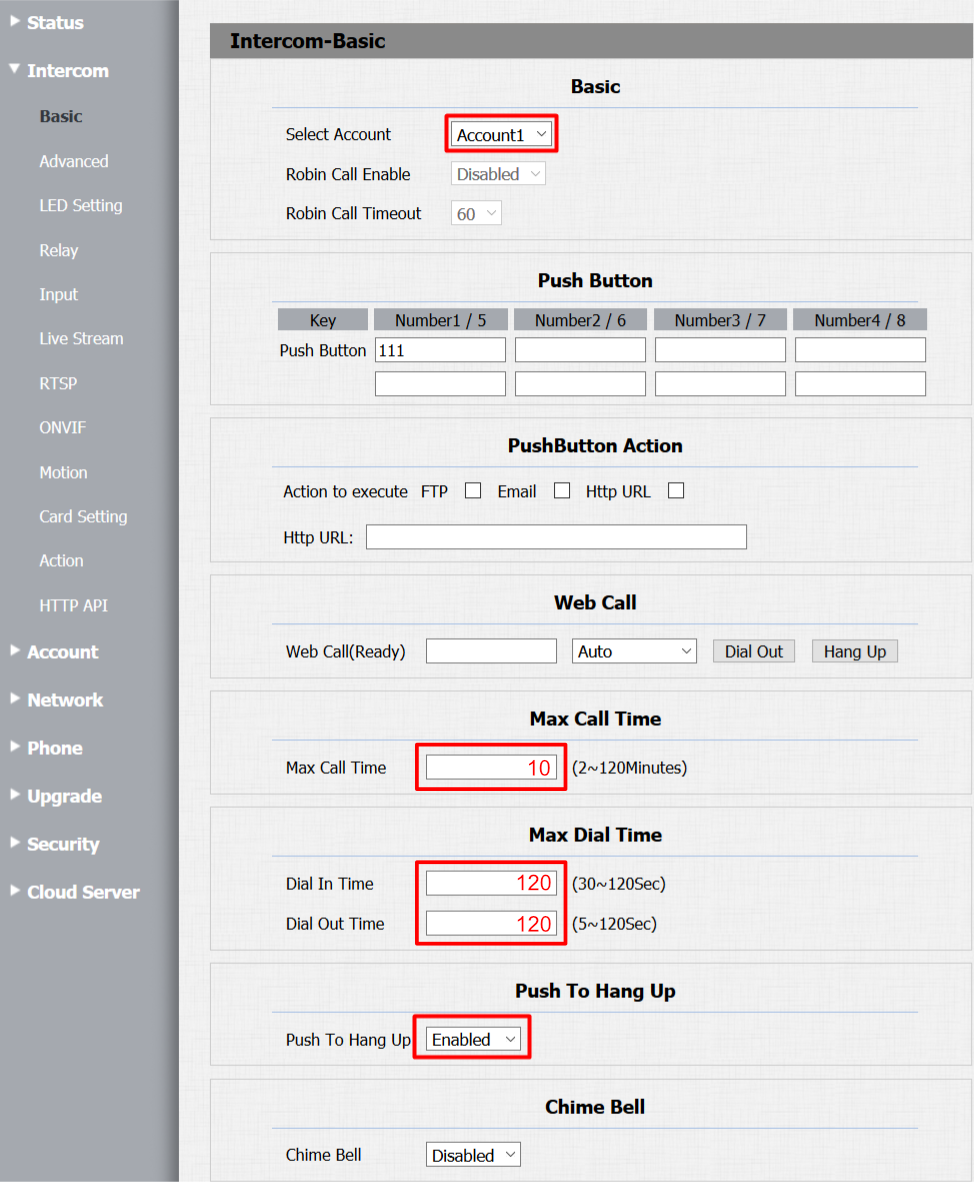
Choose Account1.
Set the Push Button key number to call in first place as 111.
Set Max Call Time to 2 minutes. Please note that even if this is set to longer time, the TapHome Core will end the call after two minutes.
Umožní Push To Hang Up - this will allow to finish call immediately after pushing the call button during call.
Set Max Call Time to 10 minutes, and Dial In / Out Time to 120 seconds.
Navigate to Intercom - Relay and set following parameters:
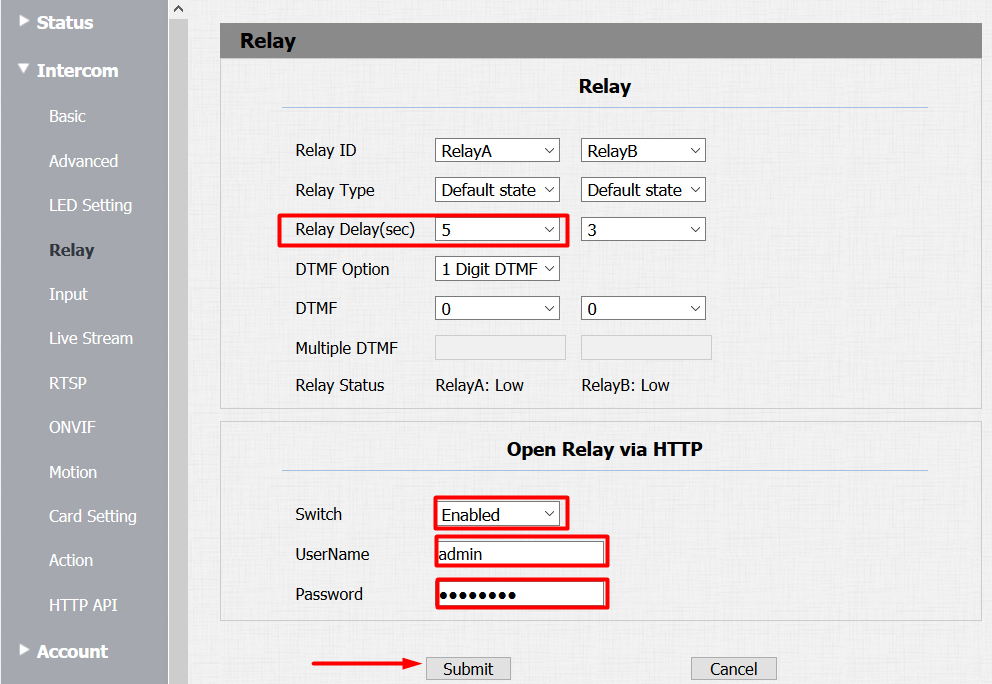
Set the Relay Delay(sec) to number of seconds for which the door will be opened after triggering the door switch through TapHome app. Please note that the same value should be set in TapHome HTTP switch parameters.
Enable Packet parser switch open.
Set the UserName to admin and password to the same as for login to the device. Please note that there is only one account definition in TapHome app - so all access need to be set to the same account.
Navigate to Intercom - RTSP and set the following parameters:
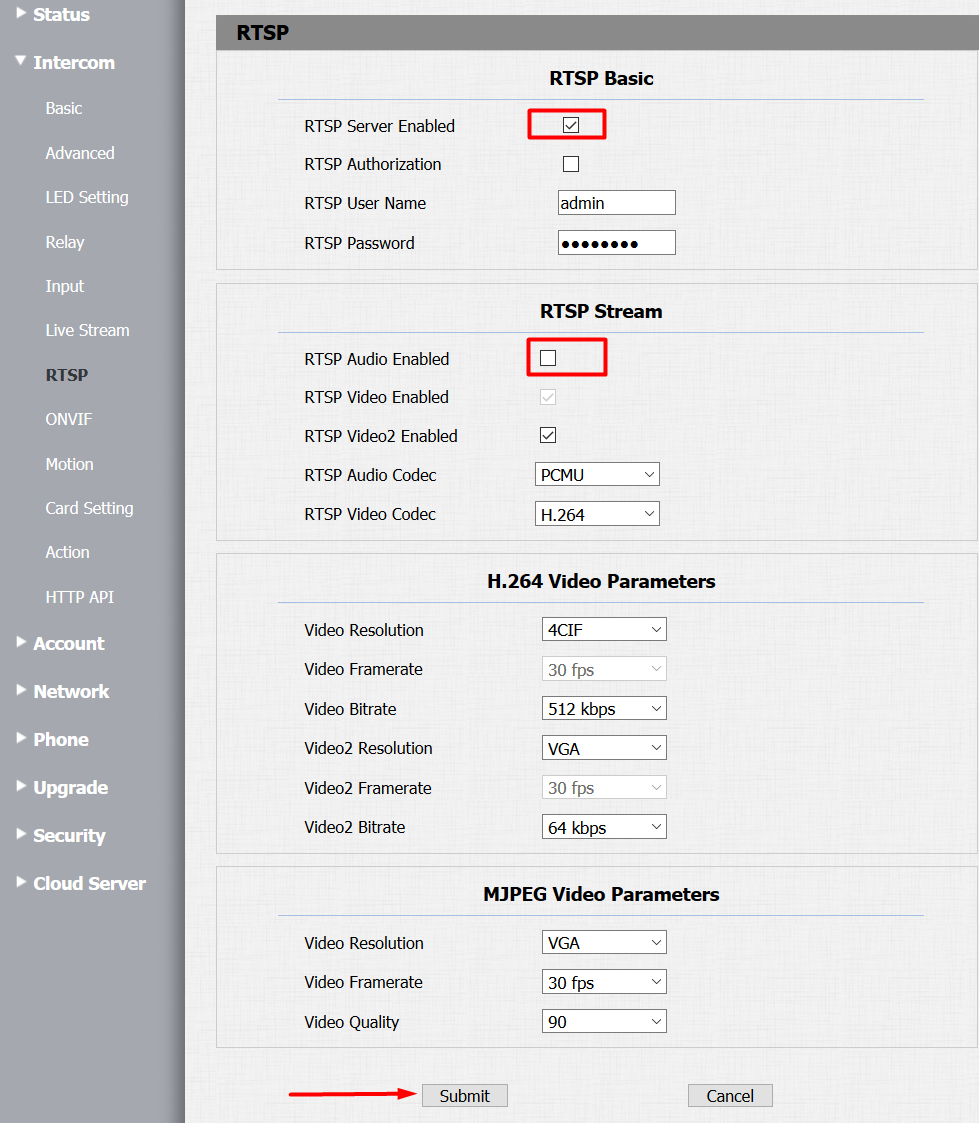
Enable RTSP Server.
Disable RTSP Audio - audio will be transferred through SIP.
Navigate to Intercom - HTTP API, and set following parameters:
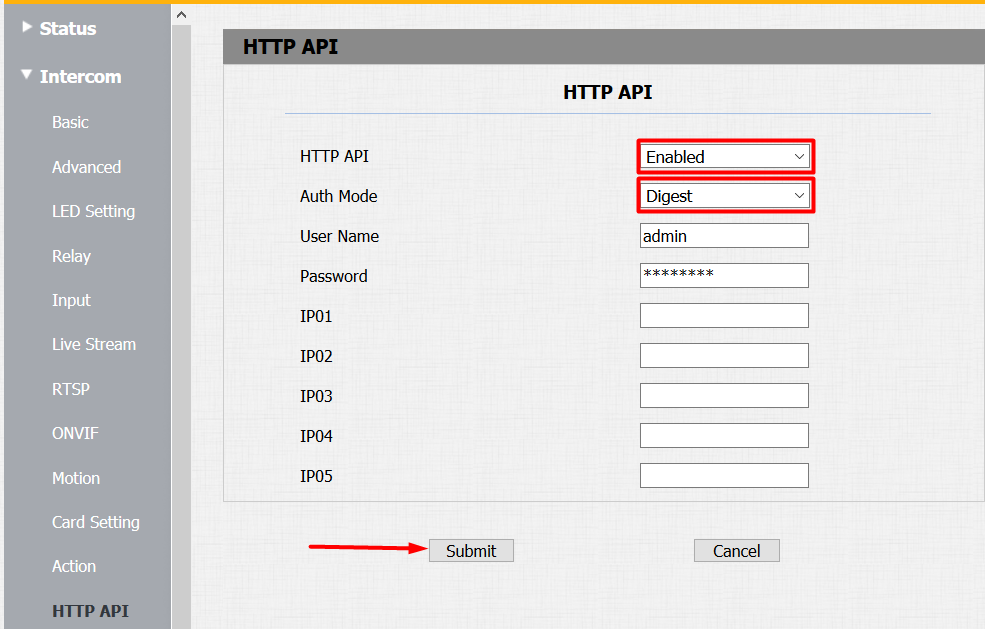
Enable Packet parser.
Set Auth Mode to Digest.
Navigate to Account - Basic and set following parameters:
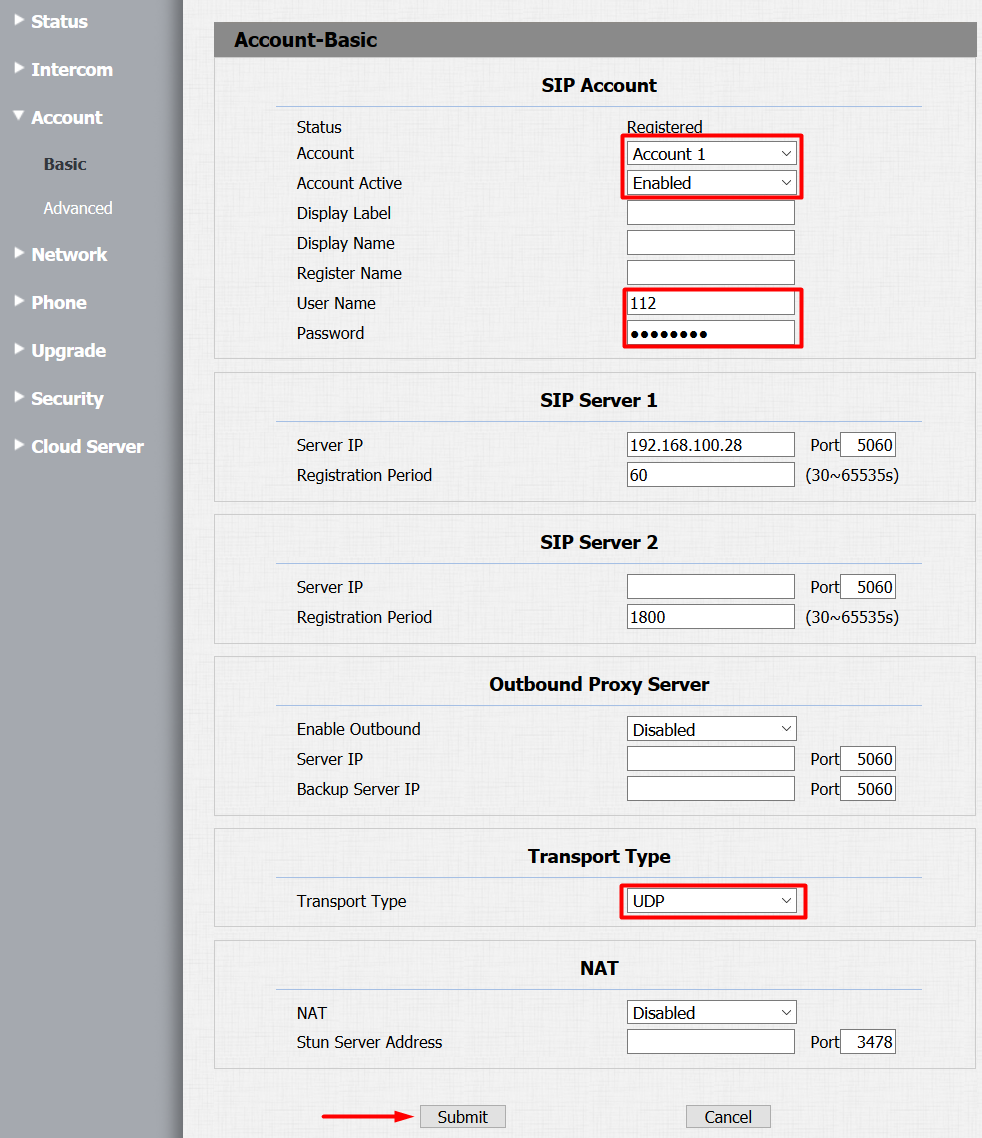
Choose Account 1 and set it to Enabled.
Set User Name to 112 and any password.
Set the SIP Server 1 IP address to TapHome Core IP address. To find Core address see My location. Please note that it is suggested to use static IP address for TapHome Core and also for door bell device. Follow this documentation for TapHome Core static IP address configuration.
Set Transport Type to UDP.
Please note that after all settings are correct, than the Status of account will change to Registered.
Navigate to Account - Advanced and set the following parameters:
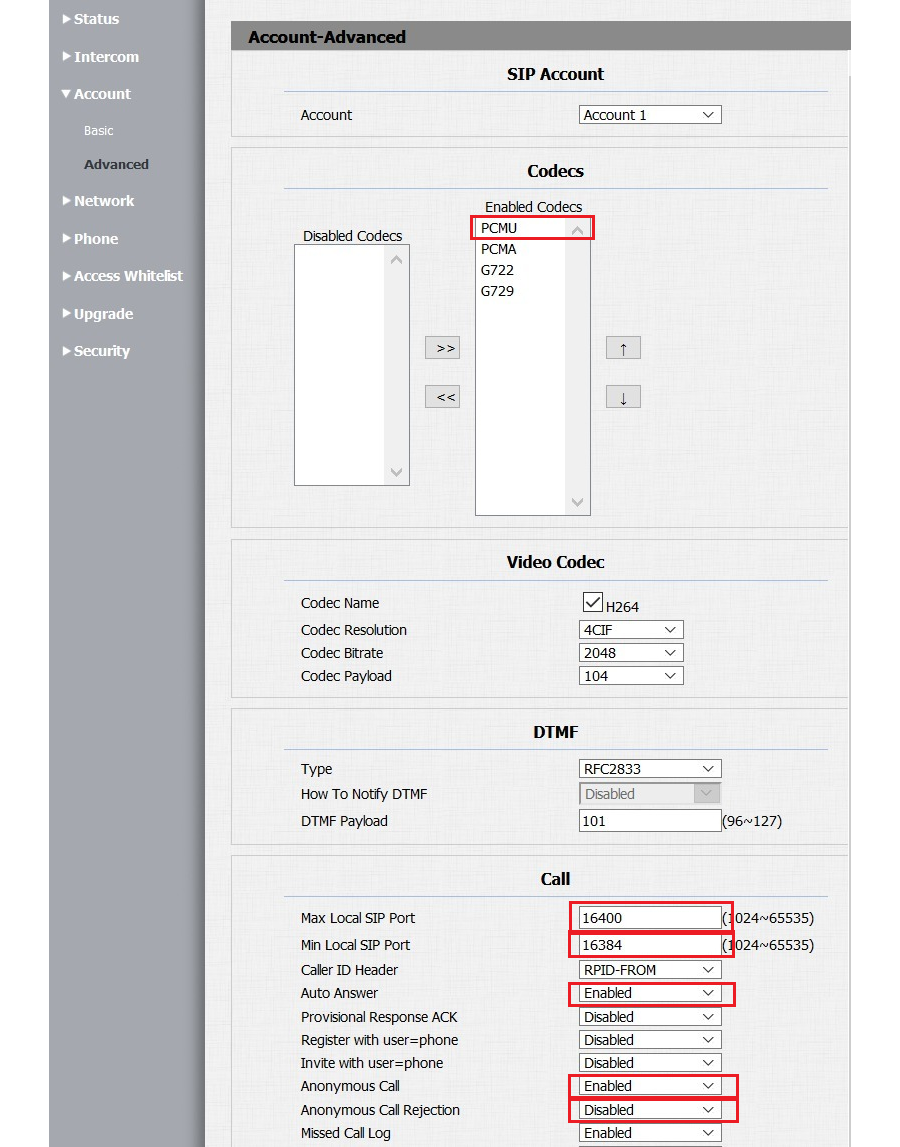
Choose Account 1.
Check that the PCMU is in enabled audio codecs. Other audio codecs can be moved to disabled.
Set Auto Answer to Enabled.
Set Anonymous Call to Enabled and Anonymous Call rejection to Disabled.
Set the Max local SIP port to 16400 and the Min local SIP port to 16384.
Navigate to Network - Basic and set the following parameters:
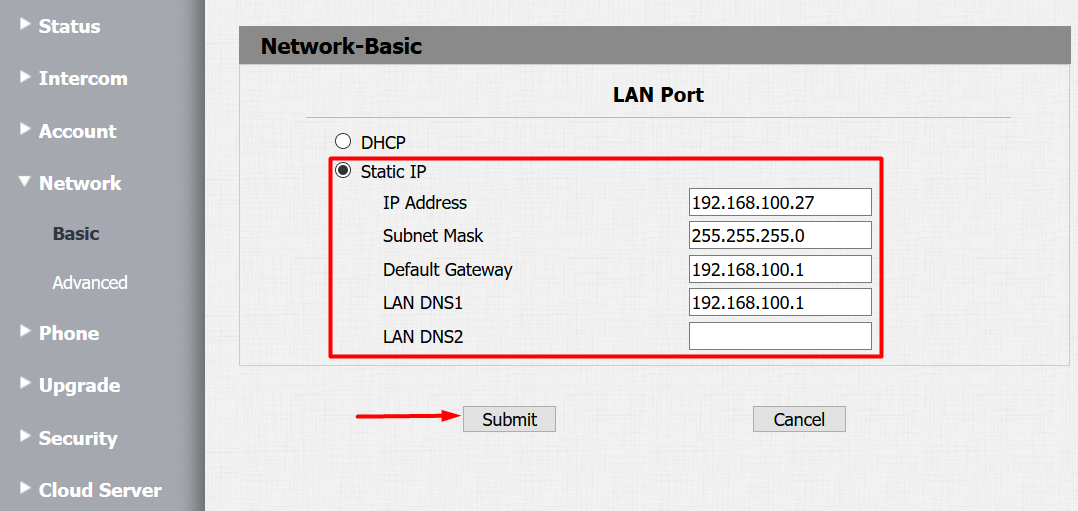
There is suggested to change the network settings from DHCP mode to Static IP mode. Please be sure that your settings are correct according to your local network router requirements.
Navigate to Phone - Call Feature and set the following parameters:
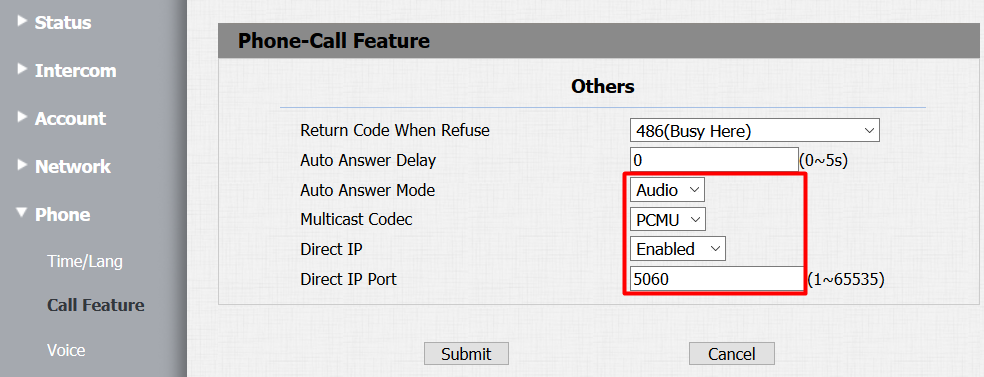
Set Auto Answer Mode to Audio (please note that video is always transmitted through either RTSP or image snapshots).
Set Multicast Codec to PCMU.
Enable Direct IP and set Direct IP port to 5060.
Navigate to Phone - Voice and set the following parameters:
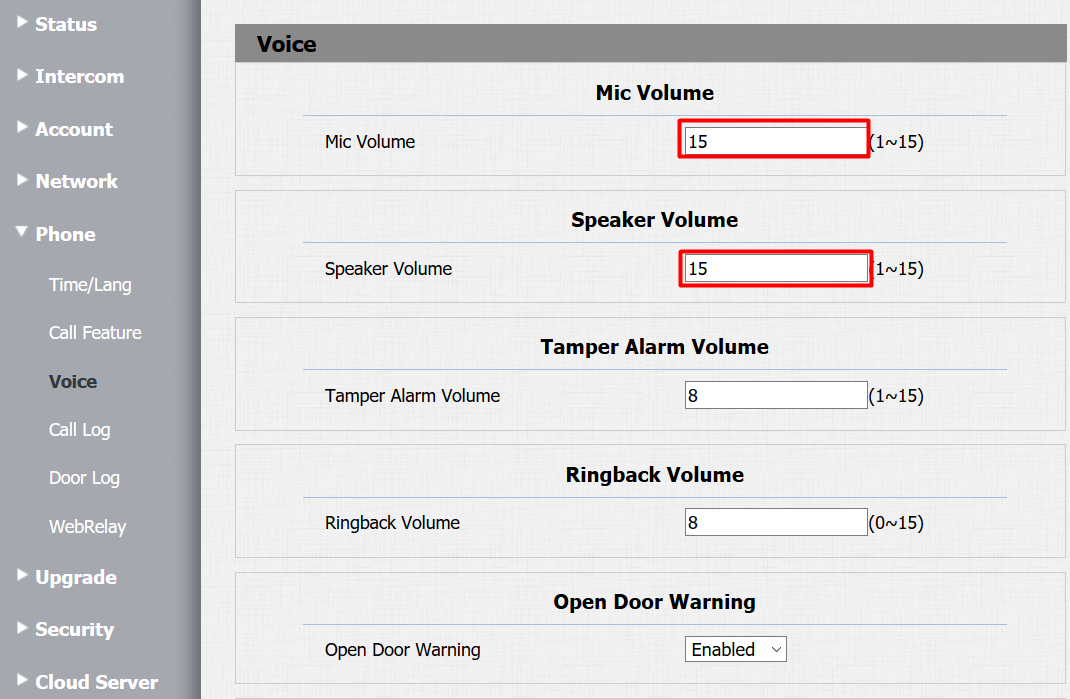
Adjust the Mic Volume and Speaker Volume and test the audio connection. We suggest to adjust at least Speaker volume to maximal value 15.
Settings inside TapHome app
Because AkuvoxR20A does not fully support ONVIF protocol, it is now necessary to set the video streams, picture snapshot and HTTP switch manually. First please follow general SIP device settings Configuration in TapHome. Add unknown device. After you set the device IP address, login name, password and connection type to Digest check that connection is working and follow with next parameters:
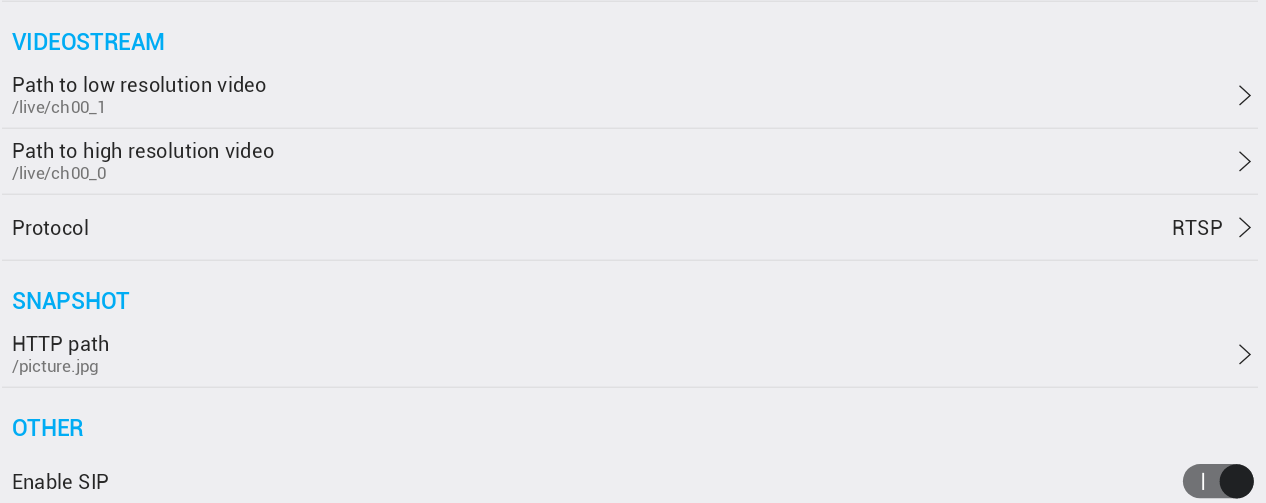
Set low resolution video stream to
/live/ch00_1
Set high resolution video stream to
/live/ch00_0
Set Snapshot HTTP path to
/picture.jpg
Enable SIP.
After this manually add HTTP switch and in service settings set following parameters:
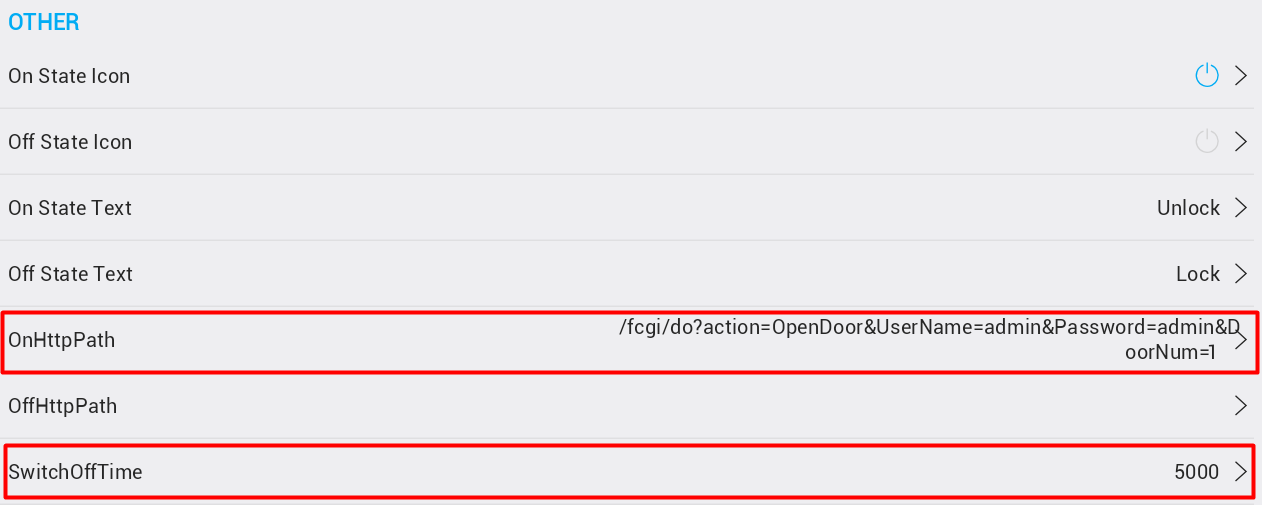
Set OnHttpPath to /fcgi/do?action=OpenDoor&UserName=admin&Password=xxxx&DoorNum=1 - please note that there is necessary to use correct password as you set it before in device.
Set Switch Off Time to the same value as in device - just in miliseconds.