- • Requirements for the controlled devices
- • Dashboards, Zones, Categories
- • Simple thermostat with hysteresis
- • Simple Heating management using Weekly schedule and Presence switch
- • Power limiting
- • Notification on high temperature (DEPRECATED)
- • Configuring hysteresis control via Equation Smart Rule
- • PID Temperature regulation
- • PID Cascade
- • Regulation of Boiler Cascade
- • Equithermic regulation
- • Heating control in high electricity tariff via load management tariff indicator input
- • Heating and Cooling modes
- • Editing multiple devices at once
- • Setting the response speed of push buttons
- • Integrate multiple control units Core
- • Safe values
- • How to combine two daily schedules in one day
- • Linking devices together
- • Device log
- • Using statistic values in Smart Rules
- • Hot water circulation pump control
- • Exporting data from TapHome into Google Spreadsheet using Integromat
- • Exporting device descriptions
- • 2025
- • 2024
- • 2023
- • 2022.2
- • 2022.1
- • 2021.3
- • 2021.2
- • 2021.1
- • 2020.1
- • 2019.1
- • 2018.1
- • 2017.1 - Blinds automation - angle control update
- • 2017.1 - Blinds automation - Depth of sun rays
- • 2017.1 - Charts updated
- • 2017.1 - Core update from the app
- • 2017.1 - Double click and triple click
- • 2017.1 - Expose devices
- • 2017.1 - Multi-value switch
- • 2017.1 - Permissions
- • 2017.1 - Replace module action
- • 2017.1 - Set to Automatic mode - "Push buttons event" Smart Rule
- • 2017.1 – Daily schedule Smart Rule
- Documentation
- Compatibility list
- Air conditioning
- AC Unit Control Configuration
AC Unit Control Configuration
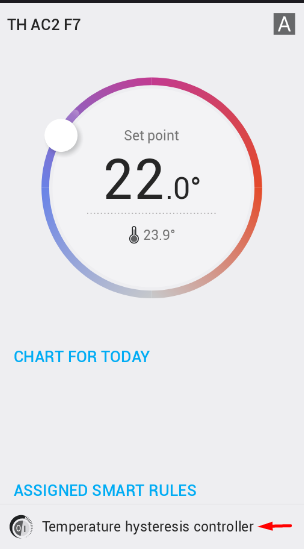
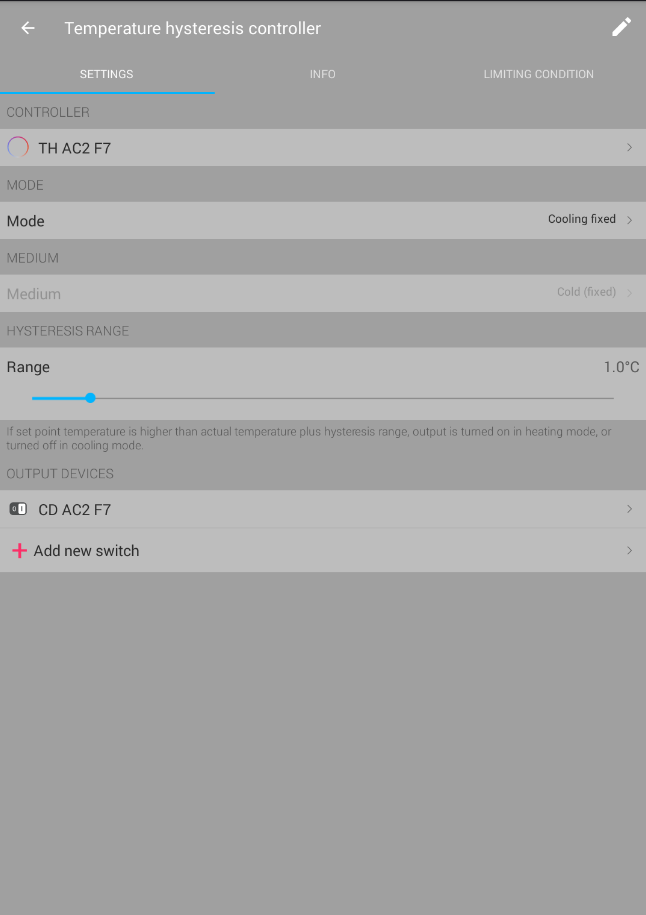
The example below is step by step guide how to configure AC Unit with a Compressor and a Fan within TapHome application using Hysteresis regulation.
|
|
|---|
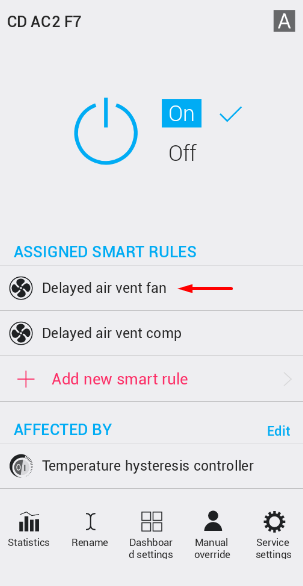
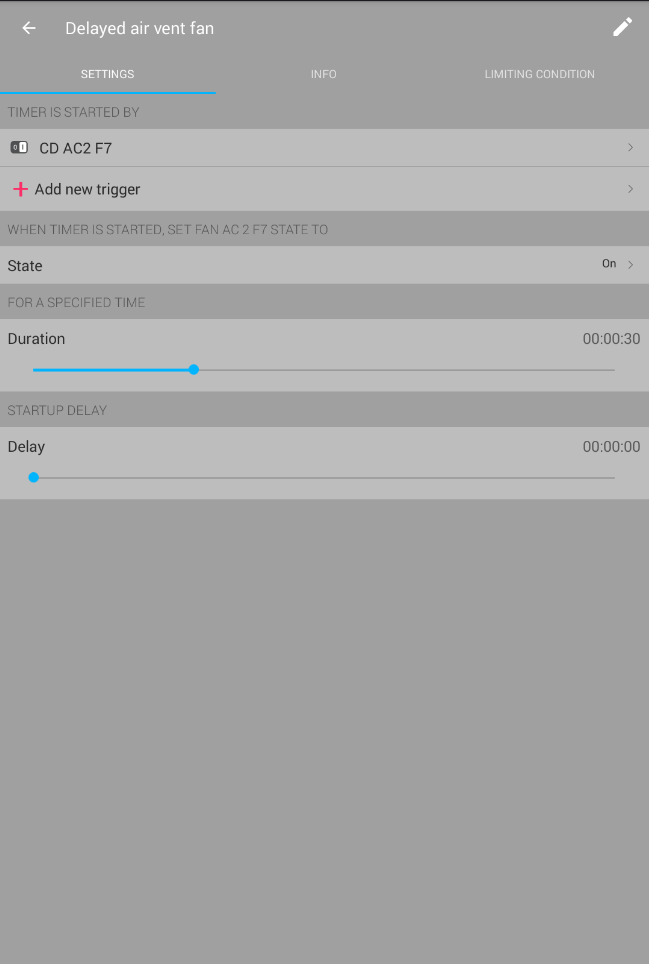
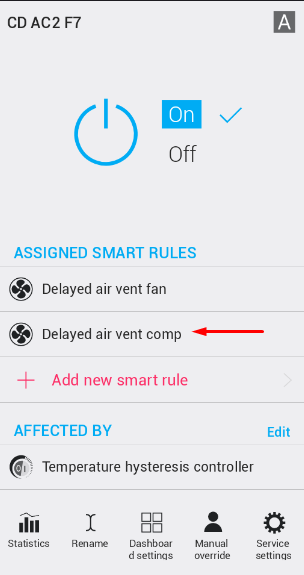
Starting and Stopping times are triggered by virtual switch Cooling demand "CD AC2 F7" - ON for start and OFF for stop. Delay value sets the delay time for FAN to start. In this scenario FAN will start immediately with "CD AC2 F7 ON" with no delay. Duration value sets the time for FAN to stop. In this case FAN will stop 30 seconds later than "CD AC2 F7 OFF".
|
|
|---|
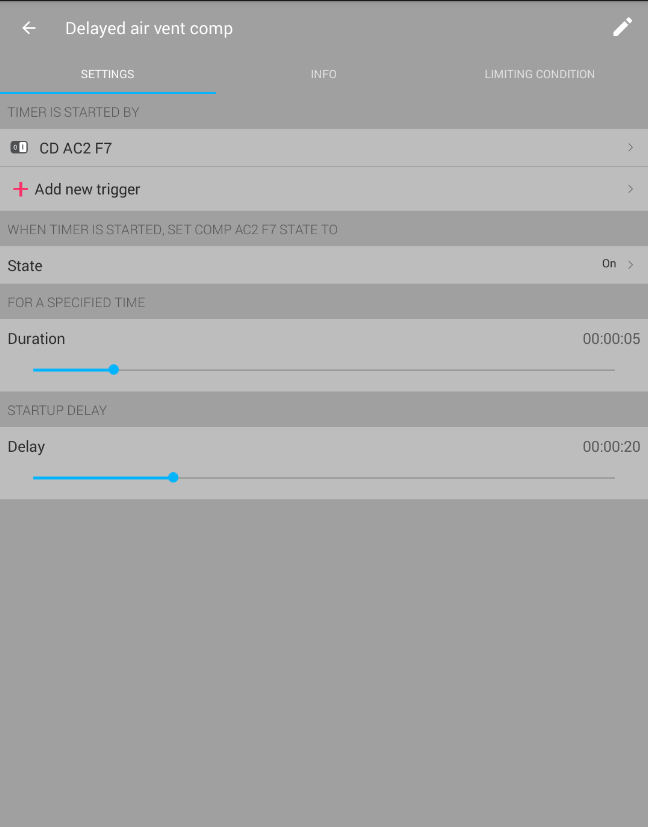
Starting and Stopping times are triggered by virtual switch Cooling demand "CD AC2 F7" - ON for start and OFF for stop. Delay value sets the delay time for Compressor to start. In this scenario Compressor will start 20 second later than "CD AC2 F7" - ON. Duration values sets the time for Compressor to stop. In this case Compressor will stop 5 seconds later than "CD AC2 F7" - OFF.
|
|
|---|
