- • Requirements for the controlled devices
- • Dashboards, Zones, Categories
- • Simple thermostat with hysteresis
- • Simple Heating management using Weekly schedule and Presence switch
- • Power limiting
- • Notification on high temperature (DEPRECATED)
- • Configuring hysteresis control via Equation Smart Rule
- • PID Temperature regulation
- • PID Cascade
- • Regulation of Boiler Cascade
- • Equithermic regulation
- • Heating control in high electricity tariff via load management tariff indicator input
- • Heating and Cooling modes
- • Editing multiple devices at once
- • Setting the response speed of push buttons
- • Integrate multiple control units Core
- • Safe values
- • How to combine two daily schedules in one day
- • Linking devices together
- • Device log
- • Using statistic values in Smart Rules
- • Hot water circulation pump control
- • Exporting data from TapHome into Google Spreadsheet using Integromat
- • Exporting device descriptions
- • 2024
- • 2023
- • 2022.2
- • 2022.1
- • 2021.3
- • 2021.2
- • 2021.1
- • 2020.1
- • 2019.1
- • 2018.1
- • 2017.1 - Blinds automation - angle control update
- • 2017.1 - Blinds automation - Depth of sun rays
- • 2017.1 - Charts updated
- • 2017.1 - Core update from the app
- • 2017.1 - Double click and triple click
- • 2017.1 - Expose devices
- • 2017.1 - Multi-value switch
- • 2017.1 - Permissions
- • 2017.1 - Replace module action
- • 2017.1 - Set to Automatic mode - "Push buttons event" Smart Rule
- • 2017.1 – Daily schedule Smart Rule
- • Firmware changelog
- Documentation
- Configuration
- Shading
- Blinds configuration wizard
Blinds configuration wizard
To start wizard go to blinds service settings and use START WIZARD button:
Blinds configuration wizard helps installer to correctly set the blinds timing. When the parameters are not set correctly, usually blinds are moving during long time operation to one side - either top or down position. After the blind moves a number of times after it has been installed, it will not move all the way to the bottom or all the way to the top. In the application, the position of the blind will be different as the real position.
To start wizard go to blinds service settings and use START WIZARD button:
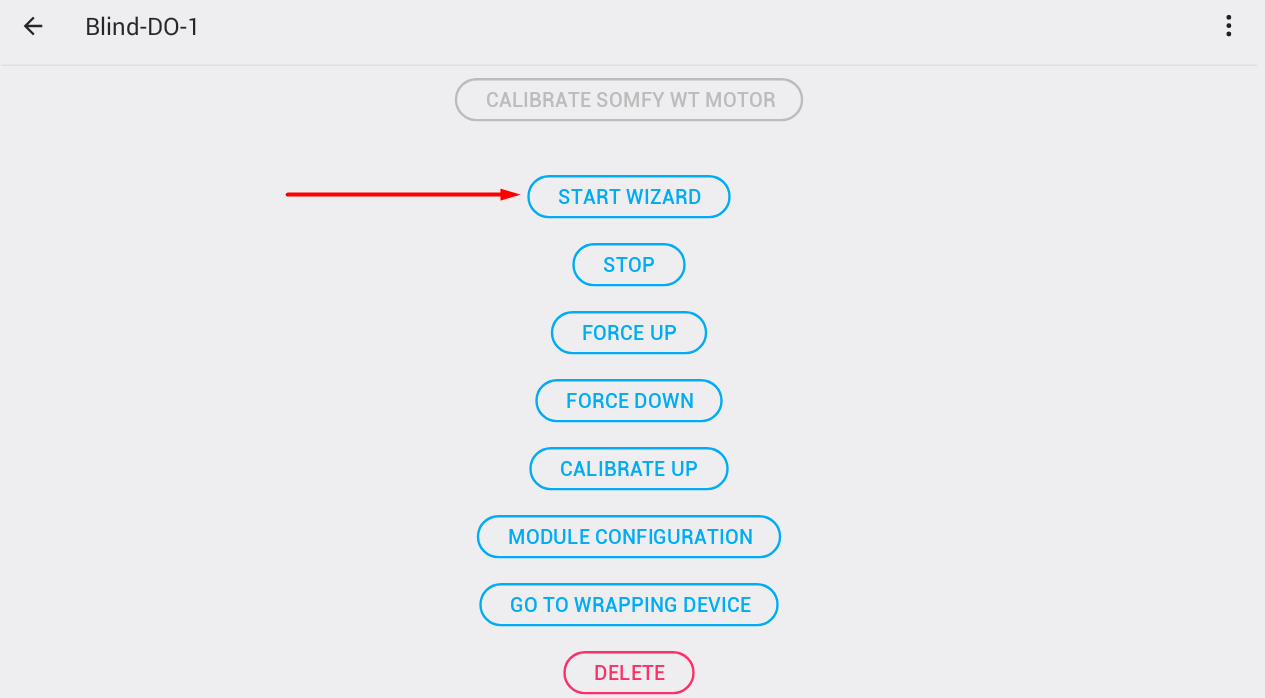
Please note that wizard will modify the blinds timers parameters during his operation.
Starting wizard will display following page:

It is necessary to start with calibration of motor starting time. When this is not done correctly than other parameters will be not possible to calibrate correctly.
Step 1: Calibrate duration until motor starts moving
The goal of this step is to measure the time the motor needs to start moving.
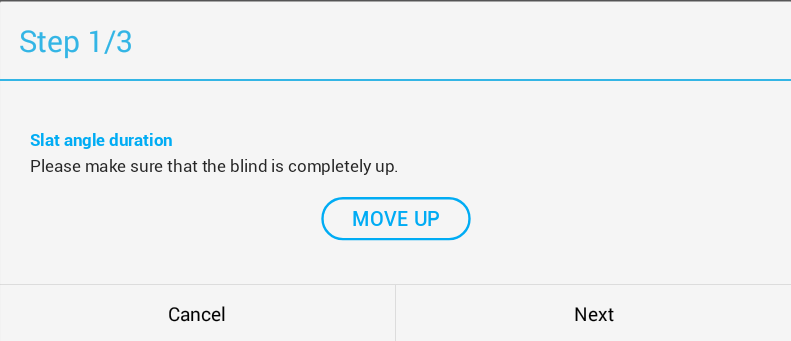
In first step ensure that blinds are completely up. Either click on MOVE UP to move the blind 1 second up, or hold this button to move the blind until the button is released.
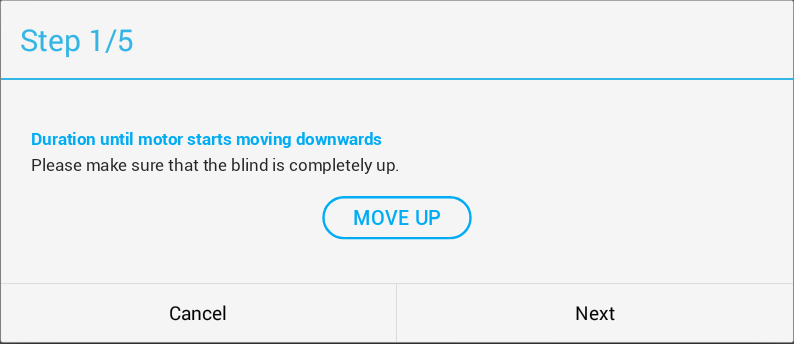
Click on Next when blind is up.
The blind will now move down 10 seconds. Wait for it to stop and mark the blind position. You can use a sticker.
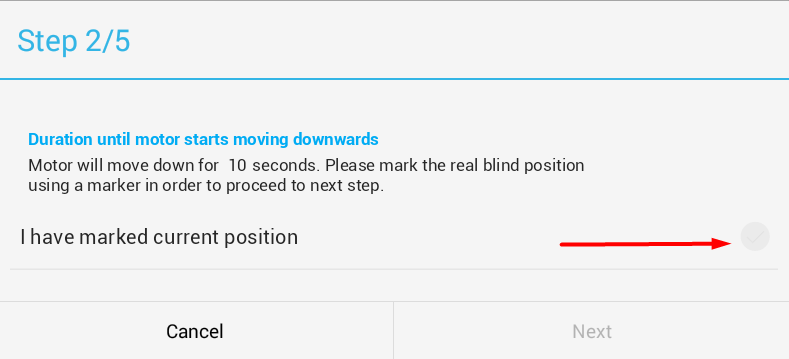
When the sticker is in place marking the position of the blind, click Next.
Blind will move up again.
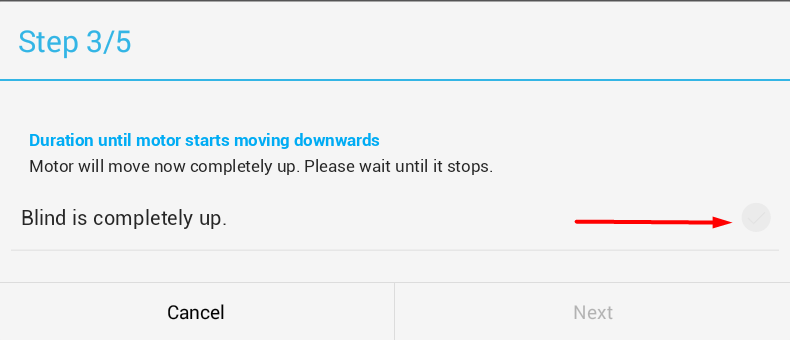
When blind stops on the top position, check Blind is completely up and click Next.
Now blind is moving down 10 seconds - but in 20 steps. If the timer is not set precisely, repeating small steps multiple times leads to accumulation of the error in timing.
When it finishes, compare the actual position of the blind with the position of the sticker.
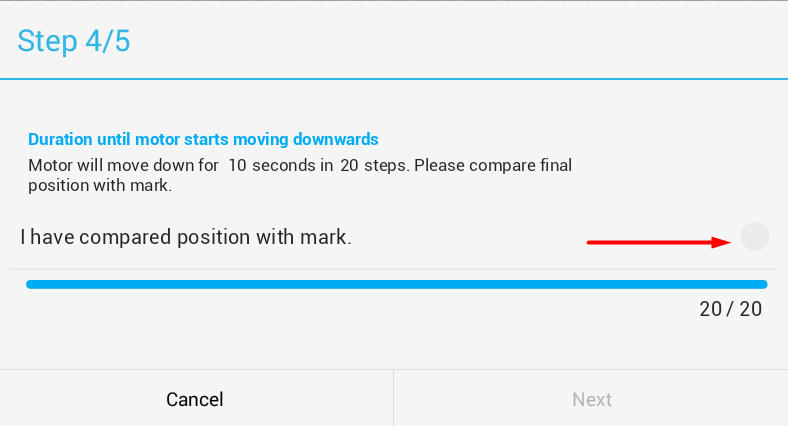
After comparison check mark and click on Next.
Now there is time to adjust the blind movement start up time according to what was observed.
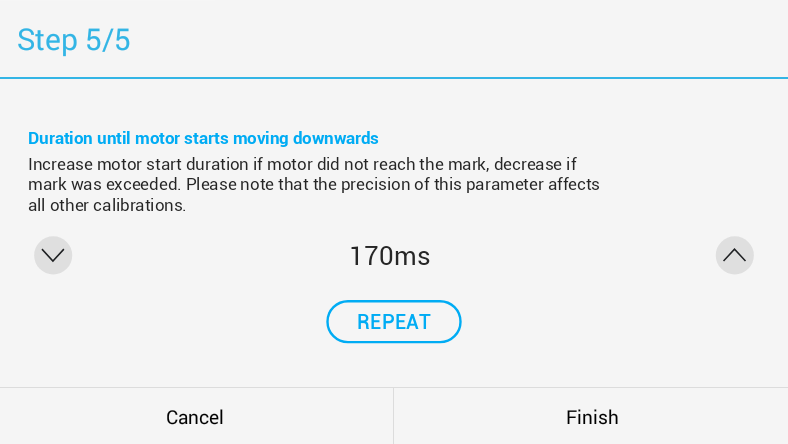
Increase the start duration time if motor did not reach the mark, decrease if mark was exceeded. Please use small steps - like change 5ms or 10ms to preciously set this parameter. After the duration adjustment, click Repeat. The test runs again. After the test, compare the actual position of the blind again against the sticker position. A difference of a less than 5 millimeters is ok. If the difference is bigger, adjust the time and run the test again.
Step 2: Calibrate level duration time
The goal of this step is to measure the time the blinds needs to go from top to bottom.
Again in first step ensure that the blind is completely up.
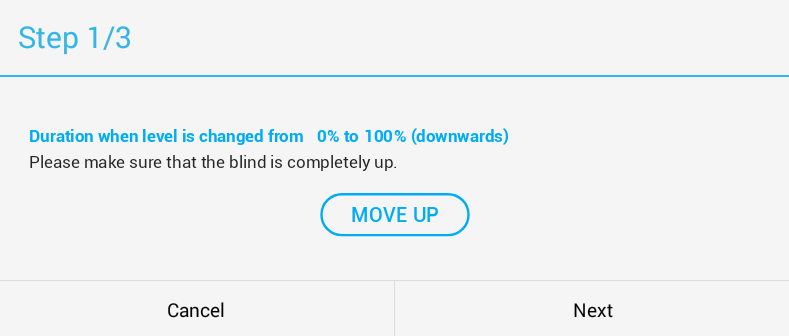
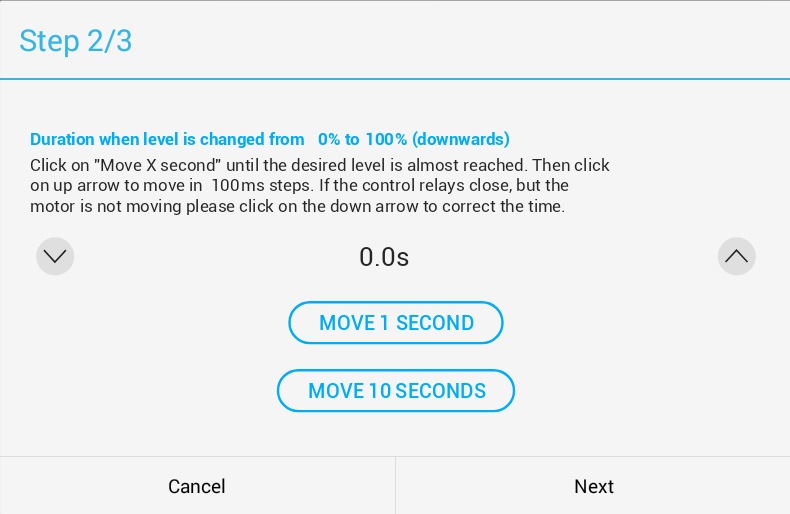
- Click Move for 10 seconds until the blind is close to bottom. It is important that the blind does not reach bottom within these 10 seconds.
- Click Move for 1 second until the blind is close to bottom.
- Adjust the blind position with 0.1 second increments to reach the bottom. When you use blinds with mechanical button which stops the blind when it reaches the bottom position, than it is helpful if you can listen to the control relays of TapHome device. Only when control relays close, but the blind is not moving, then the time should be decreased.
Click on Next when blind is in bottom position.
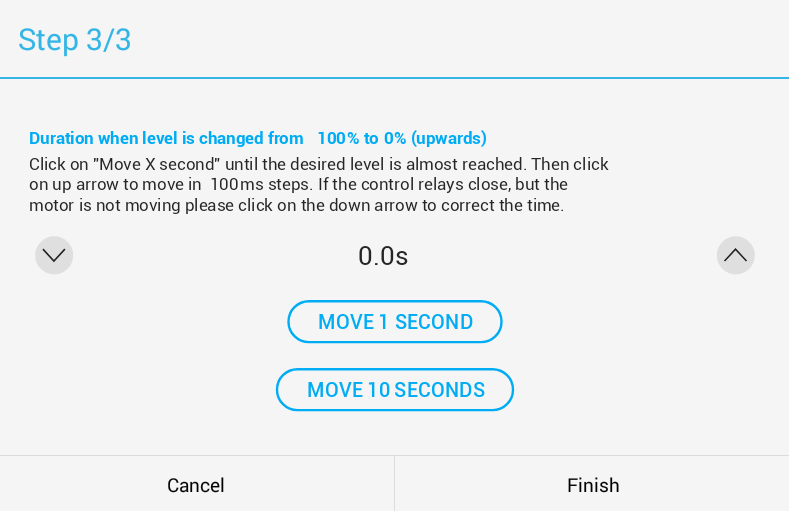
In next step use the same procedure as in Step 2 - just the blind is moving up. Please note that usually moving up need little bit higher time. Click on Finish when blind is in top position and the time is correct.
Step 3: Calibrate angle duration time
First again ensure that the blind is in top position.
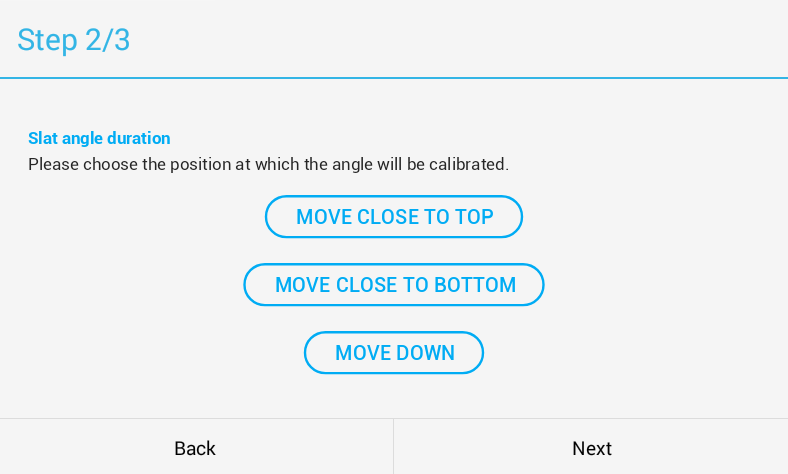
After you click Next the page with choosing position for angle calibration will be displayed.
After clicking Next the angle time adjusting page is displayed.
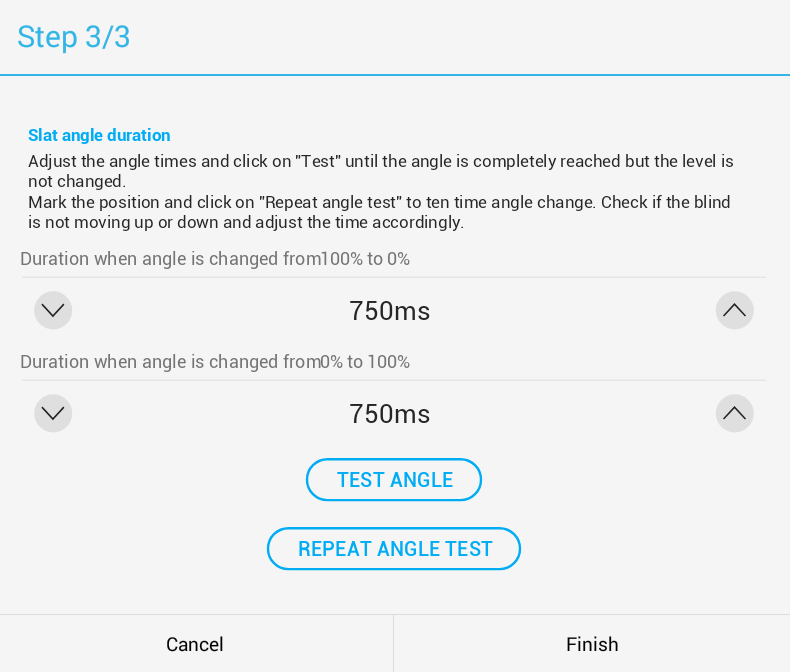
First click on Test angle - this will run single angle change. Adjust the times until the blind is completely open - but it is not moving up. Please adjust first both times to same values.
After finishing single angle time adjustment mark the blind position with a sticker like in Step 1 above. Then click Repeat angle test to find out if the blind is not moving down/up during many angle changes - if it is accumulating a potential duration error. Mark the new position before you repeat test again in case the blind position has changed during the first test.
Click Finish if the parameters are correct.