- • Requirements for the controlled devices
- • Dashboards, Zones, Categories
- • Simple thermostat with hysteresis
- • Simple Heating management using Weekly schedule and Presence switch
- • Power limiting
- • Notification on high temperature (DEPRECATED)
- • Configuring hysteresis control via Equation Smart Rule
- • PID Temperature regulation
- • PID Cascade
- • Regulation of Boiler Cascade
- • Equithermic regulation
- • Heating control in high electricity tariff via load management tariff indicator input
- • Heating and Cooling modes
- • Editing multiple devices at once
- • Setting the response speed of push buttons
- • Integrate multiple control units Core
- • Safe values
- • How to combine two daily schedules in one day
- • Linking devices together
- • Device log
- • Using statistic values in Smart Rules
- • Hot water circulation pump control
- • Exporting data from TapHome into Google Spreadsheet using Integromat
- • Exporting device descriptions
- • 2025
- • 2024
- • 2023
- • 2022.2
- • 2022.1
- • 2021.3
- • 2021.2
- • 2021.1
- • 2020.1
- • 2019.1
- • 2018.1
- • 2017.1 - Blinds automation - angle control update
- • 2017.1 - Blinds automation - Depth of sun rays
- • 2017.1 - Charts updated
- • 2017.1 - Core update from the app
- • 2017.1 - Double click and triple click
- • 2017.1 - Expose devices
- • 2017.1 - Multi-value switch
- • 2017.1 - Permissions
- • 2017.1 - Replace module action
- • 2017.1 - Set to Automatic mode - "Push buttons event" Smart Rule
- • 2017.1 – Daily schedule Smart Rule
2N

Positives
![]()
The most complete product
![]()
Build quality
![]()
Many options, suitable for large installations
Negatives
![]()
Not the cheapest option
There is necessary to set TapHome Core IP address as SIP server. To find IP address of the Core use TapHome app and click on your location to display this information. Then set following parameters:
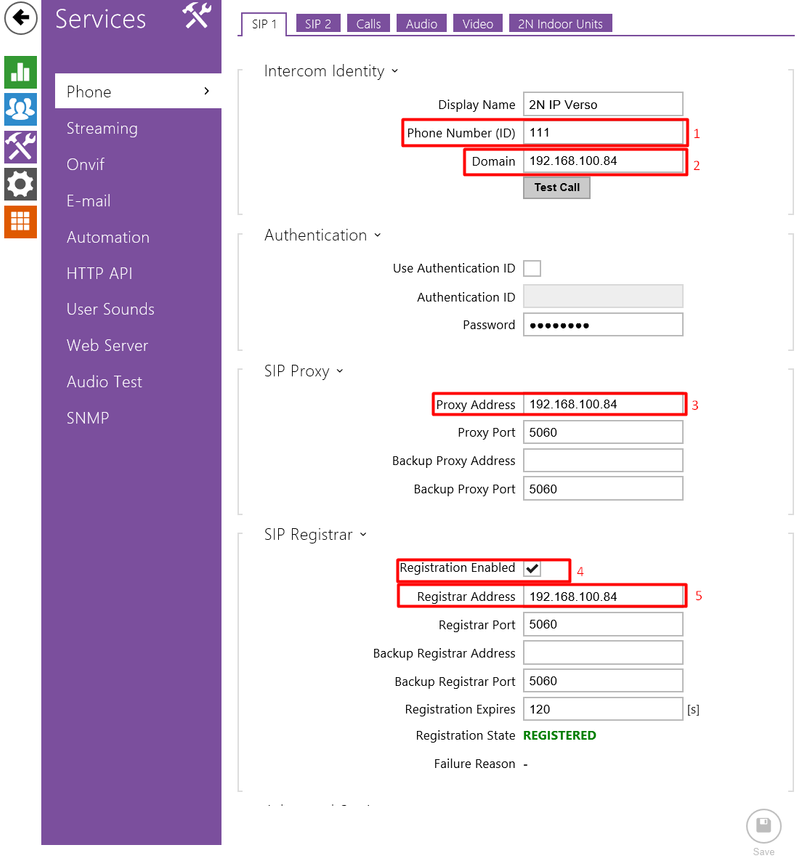
- Set phone number (ID) to 111
- Set Core IP address as Domain
- Set Core IP address as Proxy Address
- Enable registration
- Set Core IP address as Registrar address
Save the values. After adding the device to TapHome the registration state change to REGISTERED.
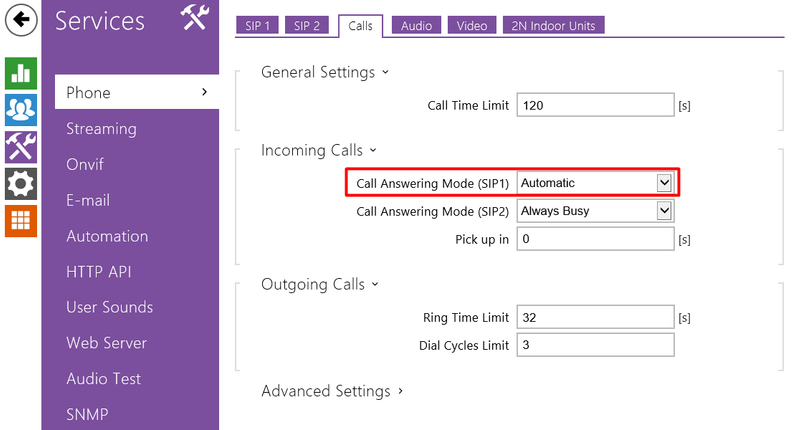
Set call parameters:
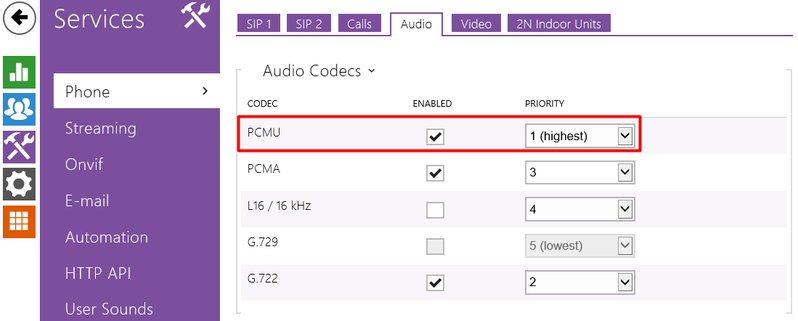
TapHome SIP server use audio codec G711 (PCMU) for audio session. Use following audio setting in the door bell device:
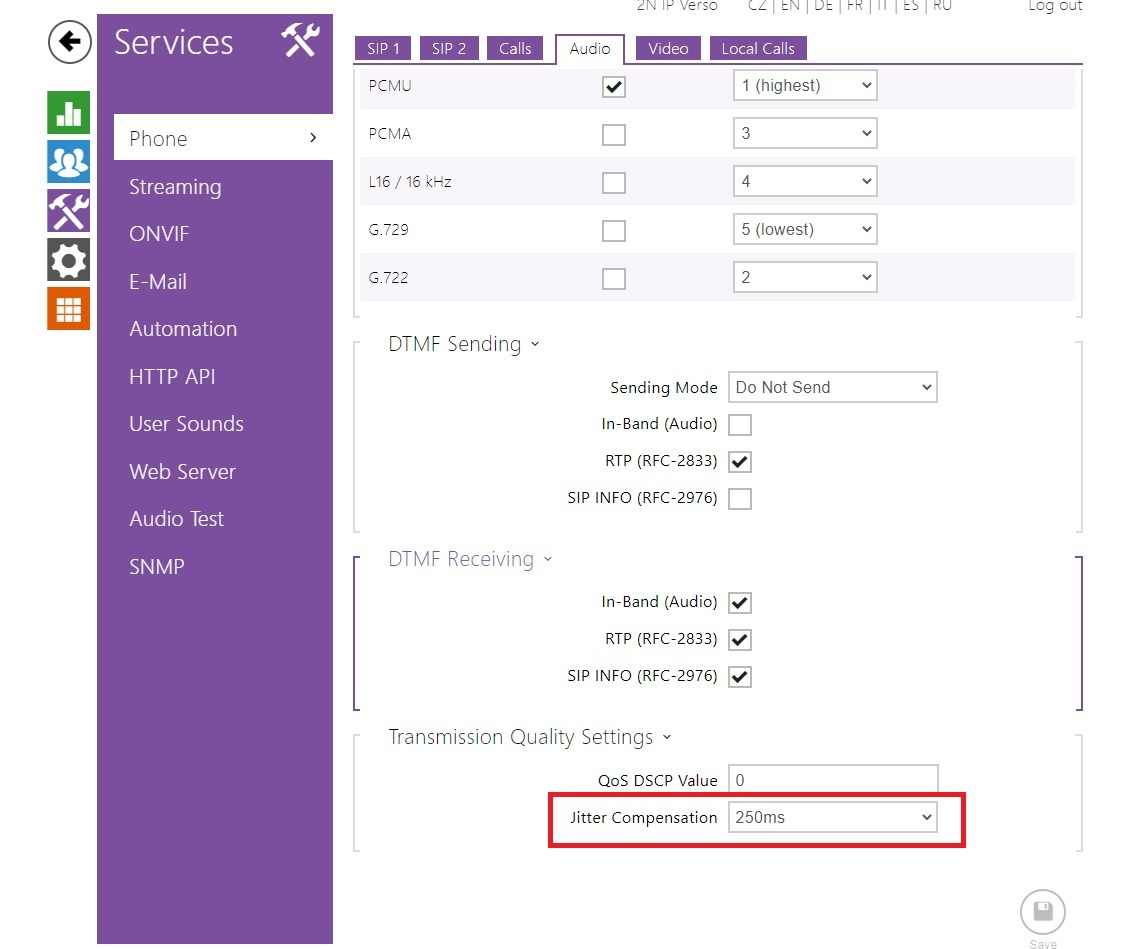
Jitter Compensation = 250ms
Enable Packet parser camera access:
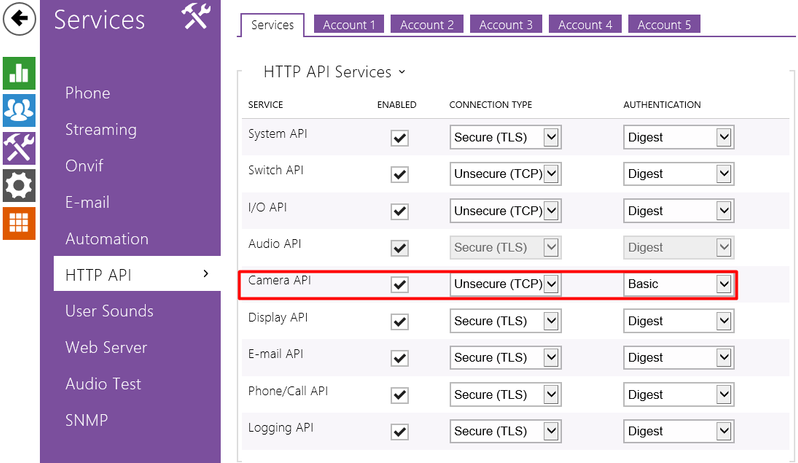
Create user for Packet parser access in Acount1.
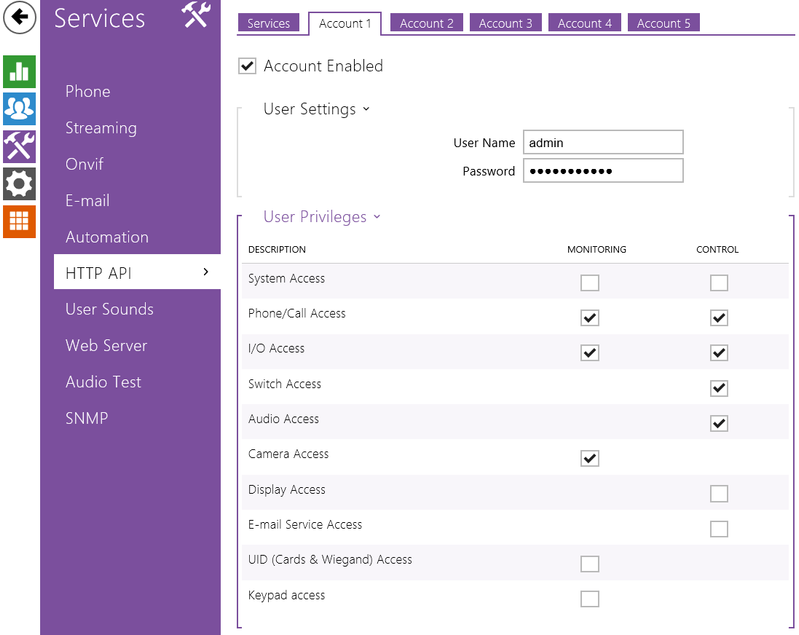
The same user name and password has to be used in TapHome as access credentials.
Add at least one user:

And edit the user parameters:
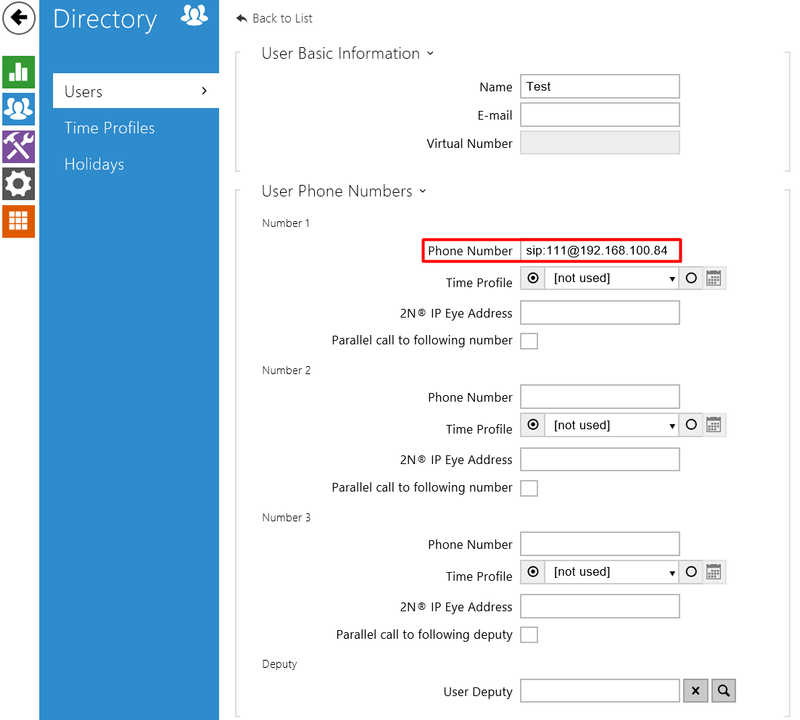
Set phone number to sip:nnn@CoreIpAddress where sip: is indicating that the call will be done through SIP, nnn is the SIP number, CoreIpAddress is the IP address set for SIP server.
Check that the door lock is set to switch1:
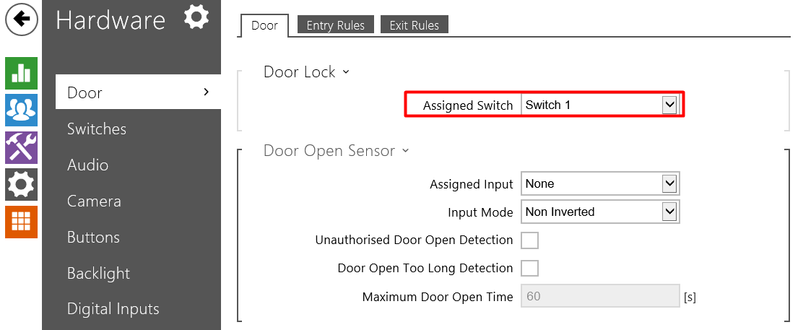
Check or set the Switch 1 parameters to corresponds to your requirements for door opening:
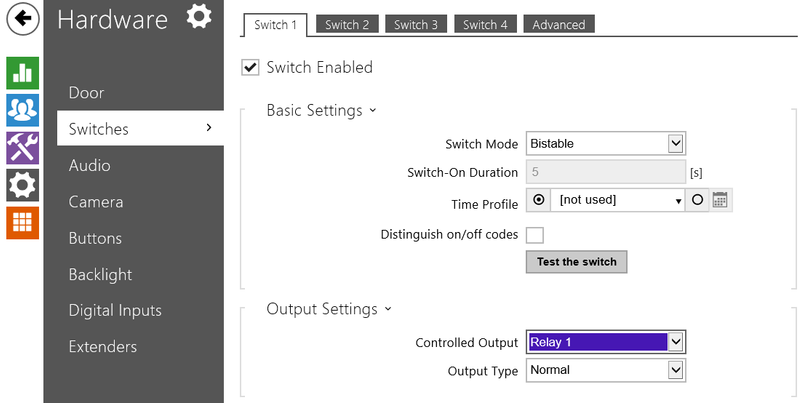
For TapHome full control over the door use Bistable switch mode.
Set quick dial button parameters:

Set button function during call to hang up. Set the predefined user to which door bell device will make SIP call when the ring button is pressed.
It is imperative that the IP address of the door bell is not changed. In case that your network router can be set to use permanent IP address for the device according to MAC address you can use this settings. In case that this can not be set it is better to set the static IP address for the door bell device. In following example the router address is 192.168.100.1 and the device IP address is set to 192.168.100.170.
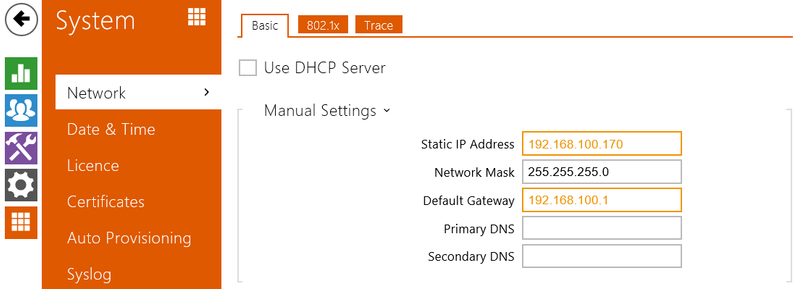
For detailed information regarding used settings or any other setting please follow the (producer Configuration Manual.)[https://wiki.2n.cz/hip/conf/latest/en]